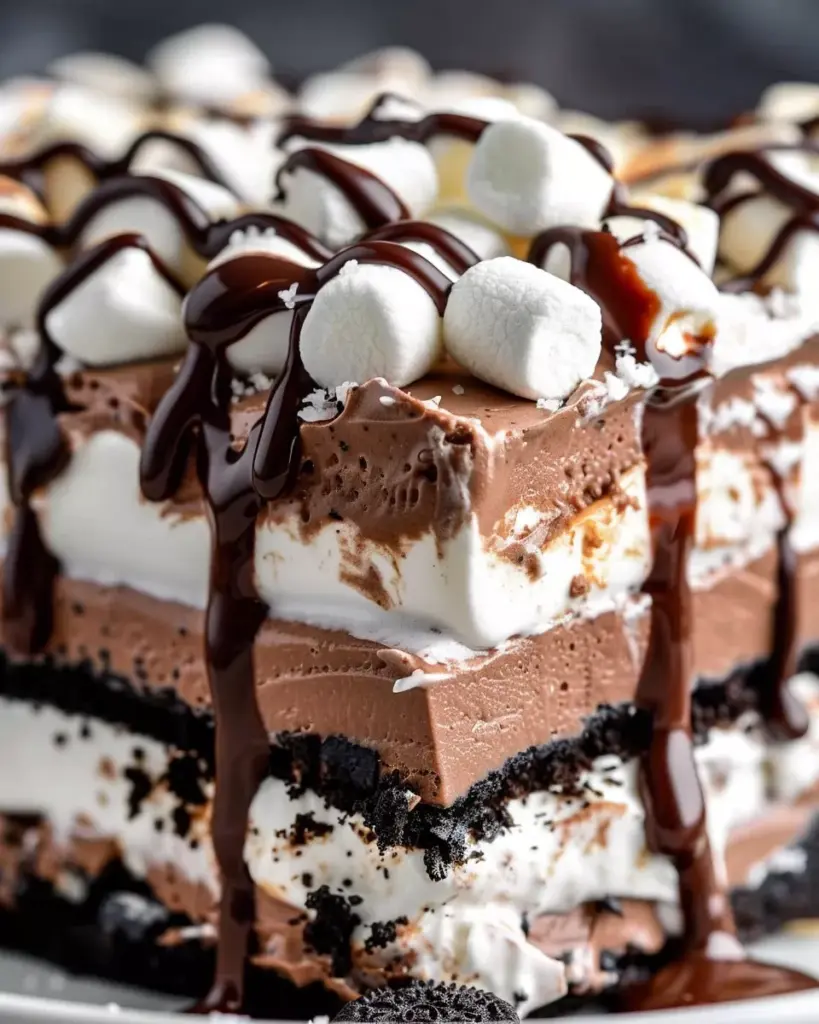
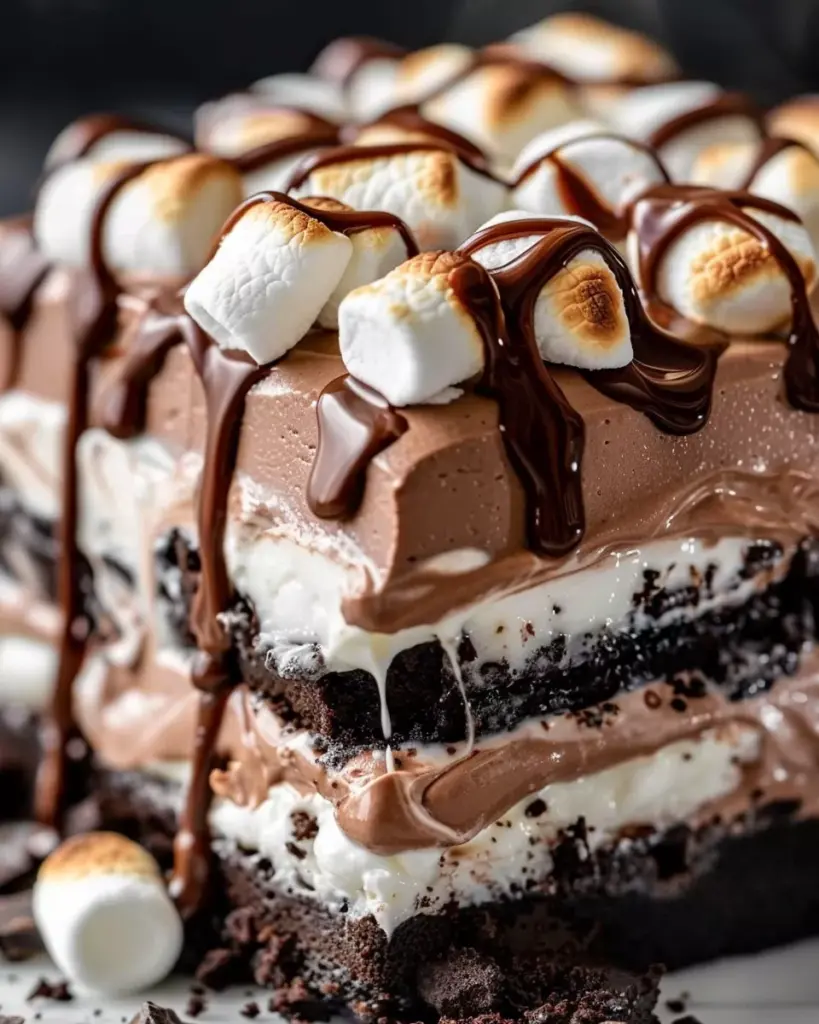
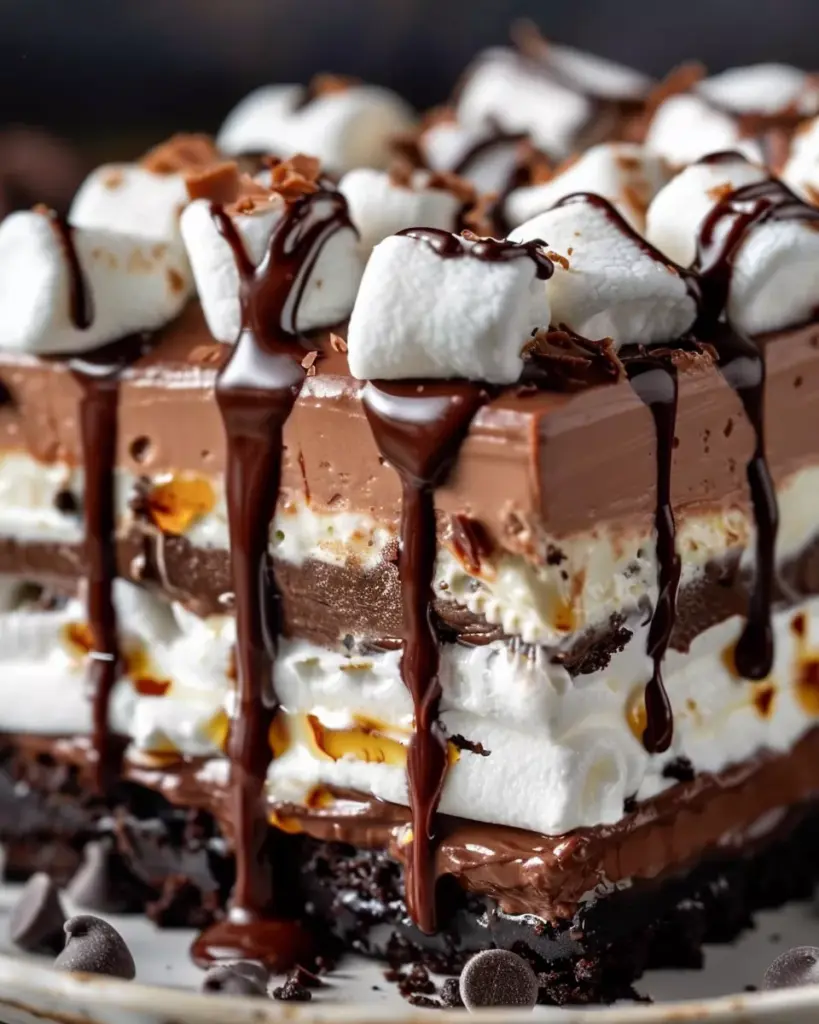
Hot Chocolate Lasagna
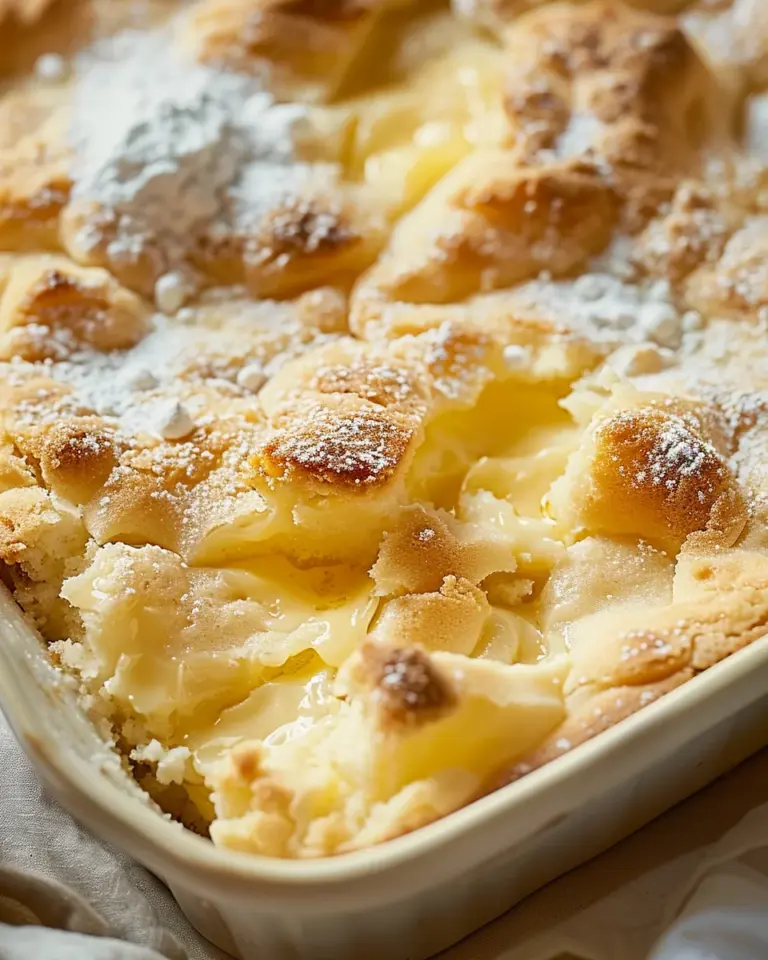
Hot Chocolate Lasagna is a rich, chilled, layered dessert that combines all the indulgent flavors of classic hot cocoa in a no-bake format. Imagine layers of Oreo cookie crust, hot chocolate cheesecake mousse, smooth chocolate pudding, and fluffy whipped topping, all crowned with mini marshmallows and a drizzle of chocolate sauce. Every bite is velvety, sweet, and undeniably satisfying.
This dessert isn’t just decadent—it’s also surprisingly easy to make. With no baking required and minimal ingredients, it’s ideal for beginner bakers, busy families, or anyone who wants to prepare a show-stopping treat without the hassle. It’s perfect for holidays, winter parties, potlucks, or simply when the craving for chocolate strikes.
Why you’ll love this recipe:
- It’s no-bake—skip the oven entirely.
- Perfectly layered, visually stunning, and loaded with flavor.
- Easy to customize with peppermint, white chocolate, or nuts.
- Make-ahead friendly—tastes even better the next day.
Let’s dive into the preparation phase and tools you’ll need to create this crowd-pleasing masterpiece.
Preparation Phase & Tools to Use
Essential Tools and Equipment
To assemble Hot Chocolate Lasagna with ease and precision, gather the following tools:
- Food processor – to finely crush the Oreo cookies for the crust. If unavailable, use a zip-top bag and rolling pin.
- 13×9 inch casserole dish – the standard dish size to layer the dessert.
- Electric hand mixer or stand mixer – essential for beating the cream cheese and whipping the cream.
- Mixing bowls – several sizes for combining layers.
- Spatula – to spread each layer evenly and smoothly.
- Measuring cups and spoons – accuracy is key for consistent results.
- Plastic wrap or foil – to cover the dish during chilling.
Importance of Each Tool
Each tool plays a key role:
- A food processor ensures the crust has a uniform texture, preventing crumbling.
- The mixer creates a fluffy, airy mousse layer that holds its structure.
- A spatula helps achieve distinct, flat layers, enhancing visual appeal.
- The casserole dish provides ample space for all layers while making it easy to cut clean slices.
Preparation Tips
- Room temperature ingredients are essential. Ensure the butter and cream cheese are softened for a smooth mousse layer.
- Use instant pudding, not cook-and-serve. This guarantees it thickens quickly and stays firm.
- Chill between layers. This keeps each layer distinct and prevents blending.
- For a clean slice, chill overnight and use a warm knife.
- Customize to taste: add a touch of peppermint extract for a festive flair, or swap in white chocolate mix for variation.
Ingredients
Here’s a clear, organized list of everything you’ll need.
For the Oreo Crust:
- 36 Oreo cookies, with filling
- ½ cup unsalted butter, melted
For the Hot Chocolate Cheesecake Mousse Layer:
- ½ cup unsalted butter, softened
- 8 oz cream cheese, softened
- ½ cup powdered sugar
- 1 teaspoon vanilla extract
- 5 envelopes (0.73 oz each) instant milk chocolate hot cocoa mix
- 1¼ cups Cool Whip or whipped topping
For the Chocolate Pudding Layer:
- 2 packages (3.8 oz each) instant chocolate pudding mix
- 2¾ cups cold milk
For the Topping:
- 1¼ cups heavy whipping cream or 2½ cups whipped topping
- 2 tablespoons powdered sugar
- 2 cups mini marshmallows
- Melted chocolate or Nutella, for drizzling
Step-by-Step Directions
Follow these directions to create a flawless Hot Chocolate Lasagna.
1. Make the Oreo Crust
- Add whole Oreo cookies (with filling) to a food processor. Blend into fine crumbs.
- Stir in melted butter until combined.
- Press the mixture firmly into the bottom of a 13×9 inch casserole dish.
- Chill in the fridge or freezer to set while you prepare the next layer.
Tip: No food processor? Crush cookies in a sealed plastic bag using a rolling pin.
2. Prepare the Hot Chocolate Cheesecake Mousse
- In a large bowl, beat the softened butter and cream cheese until smooth and creamy.
- Add powdered sugar and vanilla extract; mix until fully combined.
- Fold in the hot cocoa mix.
- Gently fold in the Cool Whip until the mixture is light and fluffy.
- Spread evenly over the chilled Oreo crust.
- Return the dish to the fridge or freezer to firm up.
Variation: Add ¼ tsp peppermint extract for a minty twist or use white chocolate cocoa mix.
3. Make the Chocolate Pudding Layer
- In a bowl, whisk the pudding mix with cold milk for 2-3 minutes until it begins to thicken.
- Spread the pudding evenly over the mousse layer.
- Chill in the fridge or freezer to set.
Note: Be sure to use instant pudding, not cook-and-serve.
4. Add the Whipped Topping
- Whip the heavy cream with powdered sugar until stiff peaks form (or use pre-made whipped topping).
- Spread evenly over the pudding layer.
- Chill the entire dish in the refrigerator for at least 4 hours, preferably overnight.
5. Garnish and Serve
- Just before serving, sprinkle mini marshmallows over the top.
- Drizzle melted chocolate or Nutella.
- Slice using a warm knife for clean cuts.
- Serve chilled.
6. Storage Instructions
- Cover and store leftovers in the refrigerator for up to 3 days.
- For longer storage, freeze and thaw overnight in the fridge before serving.
Serving Suggestions
Once your Hot Chocolate Lasagna has set and chilled, it’s time to think about presentation and serving. This dessert is not only delicious—it’s visually striking with its distinct, creamy layers. Here are some expert suggestions to elevate your serving game:
- Chill Thoroughly Before Serving: The longer it sits in the fridge (ideally overnight), the better the texture and flavor.
- Use a Warm Knife: Dip your knife in hot water and wipe dry before slicing. This creates clean, neat slices.
- Serve in Squares or Bars: Cut into 12 or 16 pieces depending on your dish size and desired serving size.
- Garnish with Extras: Add mini marshmallows, crushed Oreos, chocolate curls, or peppermint candies for a festive touch.
- Pair with Beverages:
- Hot espresso or dark roast coffee balances the sweetness.
- Cold milk or chocolate milk for a nostalgic pairing.
- Peppermint tea or spiced chai for a seasonal flavor match.
Occasions to Serve Hot Chocolate Lasagna:
- Holiday gatherings
- Winter birthdays
- Office parties
- Potlucks and bake sales
- Cozy nights in with family
Its no-bake convenience and chilled texture make it an ideal treat for events where oven space is limited or when you need a make-ahead dessert.
Common Mistakes To Avoid & How to Perfect the Recipe
Even though Hot Chocolate Lasagna is simple to prepare, some common pitfalls can affect the final result. Here’s how to avoid them and master the recipe:
Mistake 1: Using Cook-and-Serve Pudding
Why it’s a problem: Cook-and-serve pudding takes longer to set and doesn’t firm up correctly in this no-bake dish.
Solution: Always use instant chocolate pudding mix.
Mistake 2: Skipping Chill Time Between Layers
Why it’s a problem: Layers may blend together instead of setting cleanly.
Solution: Refrigerate or freeze each layer for 10–20 minutes before adding the next.
Mistake 3: Using Double-Stuffed Oreos
Why it’s a problem: Extra filling makes the crust too soft or greasy.
Solution: Stick to regular Oreos or similar chocolate sandwich cookies.
Mistake 4: Overwhipping the Cream
Why it’s a problem: Overwhipped cream can become grainy or turn to butter.
Solution: Whip to stiff peaks, not beyond. Use chilled bowls and beaters.
Mistake 5: Under-mixing the Mousse
Why it’s a problem: Lumpy mousse affects texture and appearance.
Solution: Ensure butter and cream cheese are softened to room temperature and beat until fully smooth.
Mistake 6: Using Warm Butter for Crust
Why it’s a problem: Hot butter can melt the cookie crumbs, making the crust greasy and unstable.
Solution: Melt butter, then let it cool slightly before mixing with crushed Oreos.
Mistake 7: Not Covering During Chill
Why it’s a problem: The dessert can absorb fridge odors or dry out.
Solution: Cover tightly with plastic wrap or foil during chilling.
Mistake 8: Serving Too Warm
Why it’s a problem: The layers may collapse or look messy.
Solution: Keep refrigerated until ready to serve. If frozen, thaw in the fridge for several hours first.
Side Dish Recommendations
Although Hot Chocolate Lasagna can easily stand on its own, serving it alongside complementary sides can enhance the dessert experience. Here are eight ideal pairings:
Fresh Berry Salad
A light and refreshing option to cut through the richness. Mix strawberries, raspberries, blueberries, and blackberries with a splash of lemon juice or honey.
Vanilla Bean Ice Cream
A timeless pairing. The cool, subtle flavor of vanilla ice cream contrasts beautifully with the intense chocolate layers.
Peppermint Stick Cookies
These crisp, minty cookies offer a festive crunch and a refreshing bite that complements the soft, creamy lasagna.
Caramel-Salted Pretzels
The combination of sweet, salty, and crunchy makes these a perfect texture contrast. Serve on the side or crumble on top.
Espresso or Coffee Shots
A small cup of strong black coffee or a shot of espresso pairs excellently with the sweetness and adds a sophisticated touch.
Whipped Cream & Toasted Marshmallows Bar
Set up a toppings bar where guests can add more whipped cream or slightly toasted marshmallows. Great for interactive dessert experiences.
Citrus Sorbet
A scoop of lemon or orange sorbet provides a refreshing cleanse between bites and contrasts the richness of the lasagna.
Mixed Nuts & Dried Fruit Platter
For a simple and elegant side, offer roasted almonds, pecans, and dried cranberries. This adds variety to your dessert table without overwhelming the main dish.
Expert Tips for Best Results
- Use regular Oreos: Avoid double-stuffed varieties to maintain the right crust texture.
- Soften butter and cream cheese: Room temperature ingredients blend more smoothly for the mousse layer.
- Whip cream properly: Chill your mixing bowl and beaters beforehand to help the cream reach stiff peaks faster.
- Gently fold layers: Especially when incorporating Cool Whip or whipped cream into the mousse; maintain its airy texture.
- Use cold milk: For the pudding layer to set properly, cold milk is essential.
- Chill between layers: Ensure each layer has time to firm before adding the next for cleaner, more defined sections.
- Customize with flavors: Add peppermint extract, crushed candy canes, or white chocolate cocoa mix for a seasonal twist.
Storage Instructions
Proper storage keeps the dessert fresh and flavorful:
- Refrigerator:
- Store covered with plastic wrap or foil.
- Keeps well for 3–4 days.
- Improves in taste and texture after being chilled overnight.
- Freezer:
- Can be frozen for up to 1 month.
- Wrap tightly with plastic wrap and then foil.
- Thaw overnight in the refrigerator before serving.
Note: Texture may soften slightly after freezing, but flavors remain intact.
Reheating Instructions
- No reheating required: This is a chilled dessert.
- If frozen: Allow it to thaw in the refrigerator. Do not microwave.
- Before serving: Let sit at room temperature for 10 minutes for easier slicing, if overly firm from the fridge or freezer.
Frequently Asked Questions (FAQs)
Can I use a different crust instead of Oreos?
Yes. Chocolate graham crackers, chocolate wafers, or even a brownie layer can substitute, though it will alter texture and taste.
Can I make this ahead of time?
Absolutely. In fact, it’s better when made at least 12 hours in advance. Chilling overnight allows layers to firm up and flavors to blend.
Can I substitute Cool Whip with homemade whipped cream?
Yes. Use 1¼ cups heavy whipping cream, whipped with 2 tablespoons powdered sugar until stiff peaks form, as a substitute for 1¼ cups Cool Whip.
What can I use if I don’t have hot cocoa mix?
Substitute with a blend of cocoa powder and powdered sugar—about 1 tablespoon cocoa + 2 tablespoons powdered sugar per packet—but the flavor may differ.
How do I cut clean slices?
Use a sharp knife dipped in hot water and wiped dry between cuts. This helps slice cleanly through each layer without smudging.
Can I add other flavors?
Yes. Popular additions include:
- ¼ teaspoon peppermint extract for a minty twist.
- Crushed candy canes or peppermint chips between layers.
- White chocolate cocoa mix in place of milk chocolate.
Can I scale the recipe up or down?
Yes. Use a smaller 8×8 inch dish for fewer servings and thicker layers, or double the recipe for a crowd-sized version in two dishes.
What if I don’t have instant pudding?
Instant pudding is key. Cook-and-serve types won’t set properly without heating. Stick with instant chocolate pudding for best results.
Can I make it gluten-free?
Yes. Use gluten-free chocolate sandwich cookies and ensure all other ingredients (like cocoa mix and pudding) are labeled gluten-free.
Can I freeze individual portions?
Yes. Slice, wrap each portion in plastic wrap, and store in an airtight container. Thaw in the refrigerator before serving.