Brown Sugar Pop Tart Cookies
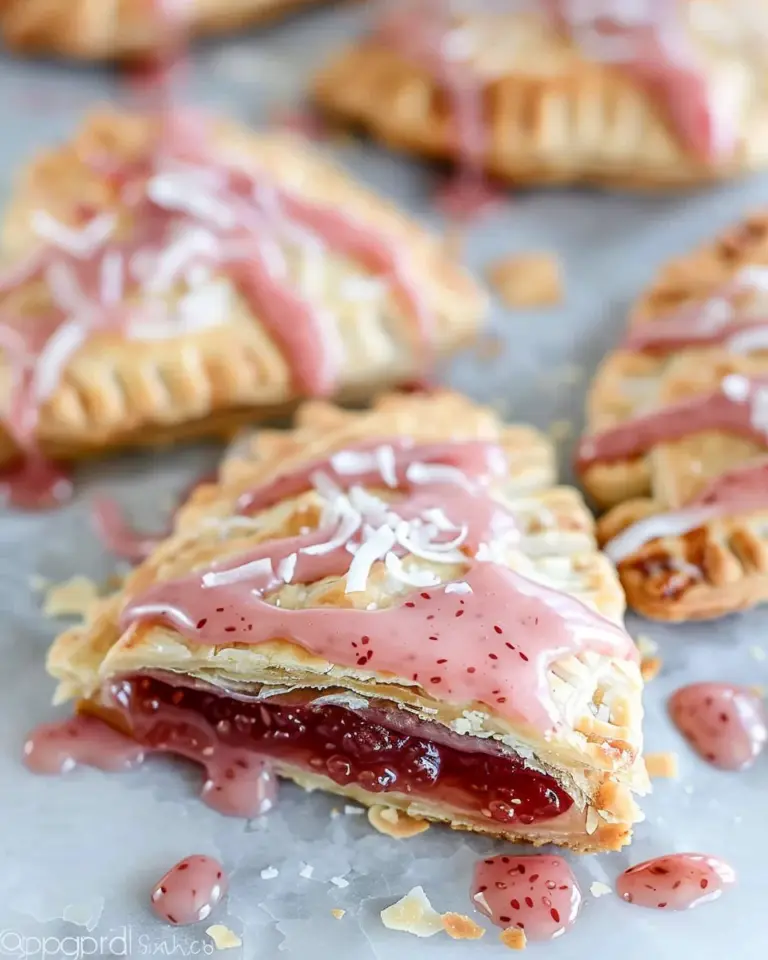
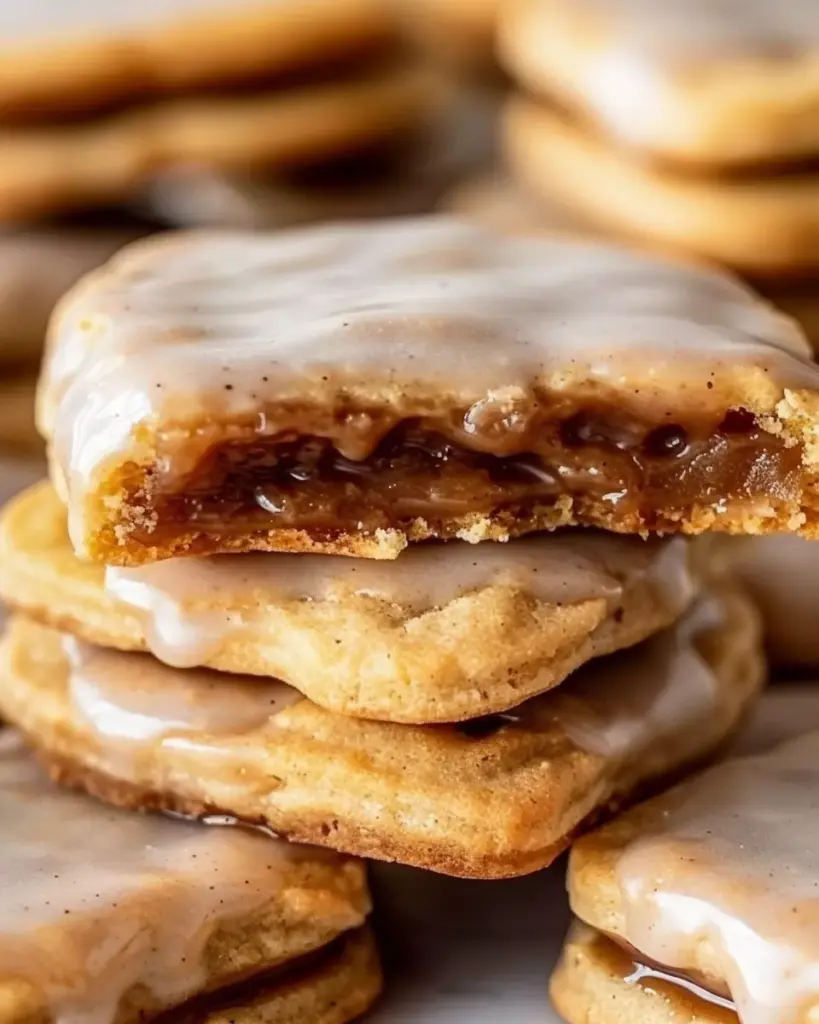
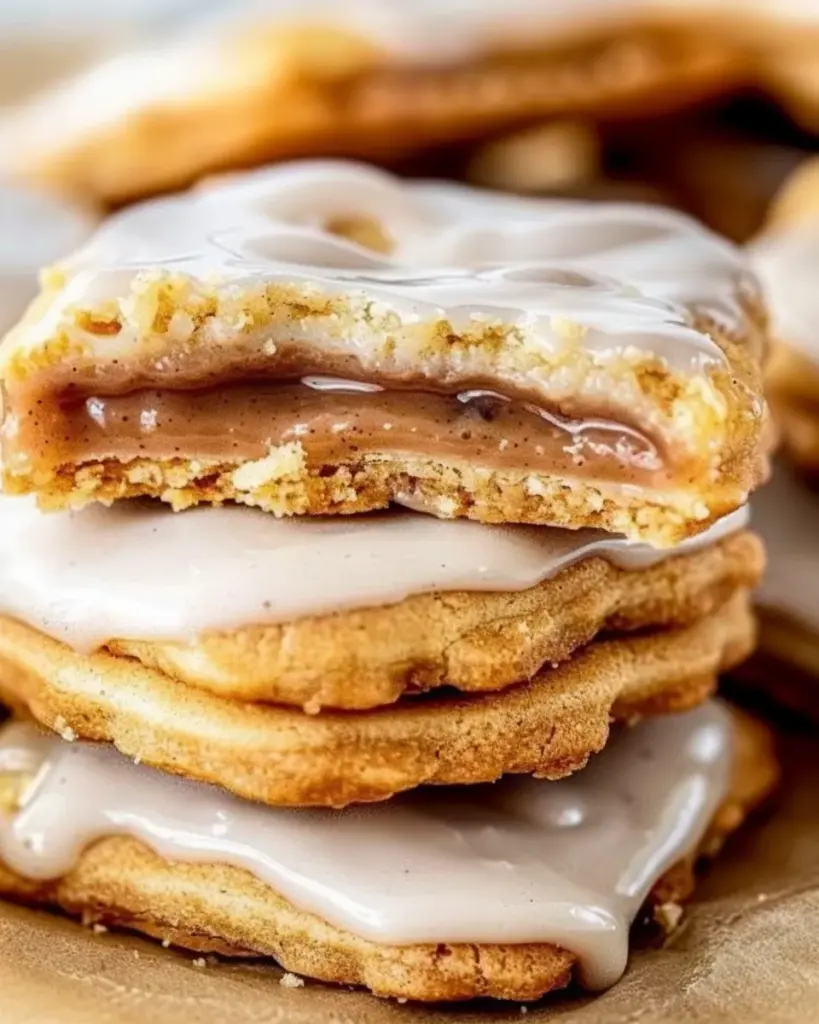
Brown Sugar Pop Tart Cookies are soft, chewy, and packed with gooey cinnamon brown sugar filling—topped with a silky glaze that sets to a smooth finish. Inspired by the nostalgic flavor of brown sugar cinnamon pop tarts, these cookies take everything you loved about those toaster pastries and elevate them into a delicious homemade dessert.
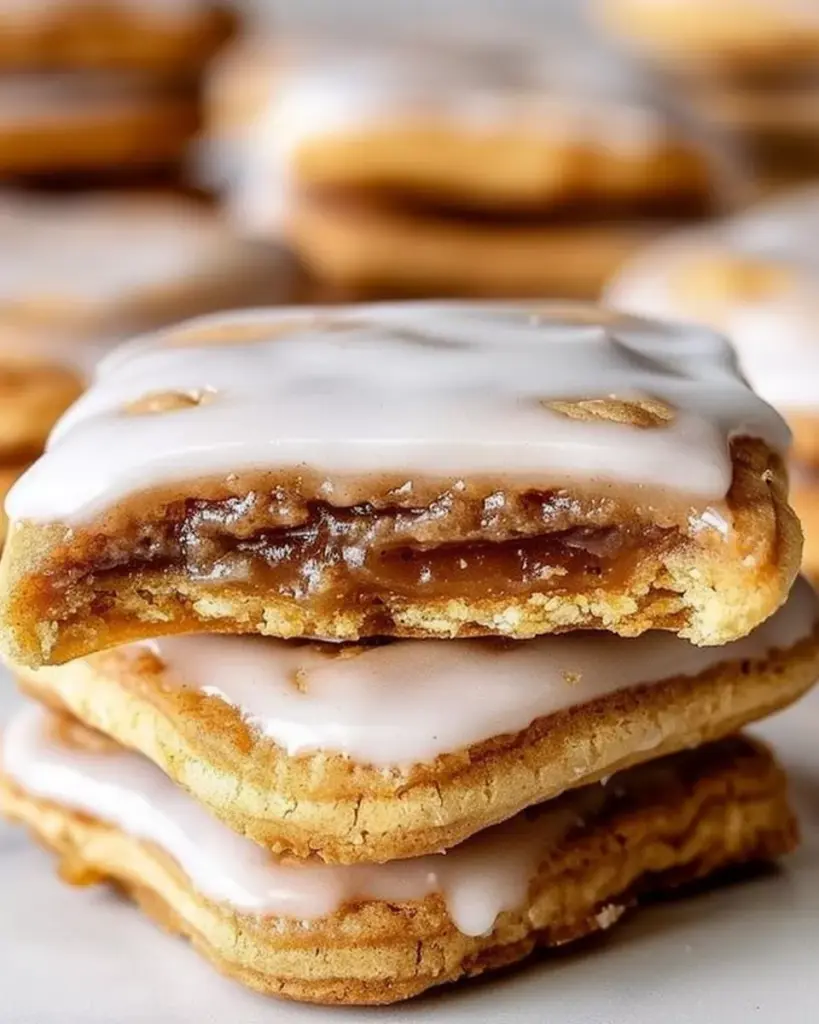
Unlike ordinary cookies, these are stuffed—yes, stuffed—with a rich, spiced filling that melts into the soft cookie dough as it bakes. Once cooled slightly, they’re finished with a cinnamon-vanilla glaze that gives just the right amount of sweetness and texture. Whether you’re baking for your family, gifting to friends, or craving a cozy treat for yourself, brown sugar pop tart cookies offer both nostalgia and indulgence in every bite.
Why You’ll Love This Recipe
- Combines the soft chew of cookies with the classic filling of a Pop-Tart
- Perfectly sweet without being overpowering
- Ideal for lunchboxes, bake sales, brunches, or dessert platters
- Easy to customize with variations in filling or glaze
- Freezer-friendly and great for gifting
Preparation Phase & Tools to Use
Essential Tools and Equipment
To create the perfect brown sugar pop tart cookies, you’ll need the following tools:
- Mixing bowls: One large for cookie dough, one small for filling
- Electric hand mixer or stand mixer: For creaming butter and sugars
- Measuring cups and spoons: For precise ingredient amounts
- Whisk: To blend dry ingredients and make smooth icing
- Cookie scoop: Ensures uniform cookie size
- Baking sheets with parchment paper: Prevents sticking and promotes even baking
- Wire cooling rack: Helps glaze set and prevents sogginess
- Rubber spatula: For scraping bowls clean
- Spoon or offset spatula: To spread icing
Importance of Each Tool
Using the right equipment ensures your cookies bake evenly, look professional, and taste incredible:
- A cookie scoop allows uniform sizing, preventing under or overbaking
- A mixer helps cream butter and sugar until fluffy, which builds structure
- Parchment-lined sheets prevent cookies from sticking and ease cleanup
- A wire rack keeps bottoms from getting soggy as they cool and ensures even airflow
- A proper whisk keeps icing smooth and lump-free for that signature glaze
Preparation Tips
- Soften butter properly – It should be soft to the touch but not melting
- Chill your dough – Keeps cookies from spreading too much
- Measure accurately – Use the spoon-and-level method for flour
- Preheat oven fully – Bake at the right temperature for optimal texture
- Cool slightly before glazing – Glaze adheres better to warm (not hot) cookies
Ingredients
For the Cookie Dough
- ¾ cup unsalted butter, softened
- ¾ cup light brown sugar, packed
- ¼ cup granulated sugar
- 1 large egg
- 2 teaspoons vanilla extract
- 2 cups all-purpose flour
- ½ teaspoon baking soda
- ½ teaspoon baking powder
- ½ teaspoon fine salt
- 1 teaspoon ground cinnamon
For the Brown Sugar Filling
- ½ cup light brown sugar, packed
- 2 teaspoons ground cinnamon
- 1 tablespoon all-purpose flour
- 2 tablespoons unsalted butter, melted
- ½ teaspoon vanilla extract
- Pinch of salt
For the Icing
- 1 cup powdered sugar
- ½ teaspoon ground cinnamon
- 1 teaspoon vanilla extract
- 2–3 tablespoons milk, as needed
Step-by-Step Directions
- Preheat your oven to 350°F (175°C). Line two baking sheets with parchment paper.
- Prepare the filling: In a small bowl, combine brown sugar, cinnamon, flour, melted butter, vanilla, and a pinch of salt. Mix until it forms a sandy, paste-like consistency.
- Cream the butter and sugars: In a large mixing bowl, beat the softened butter, light brown sugar, and granulated sugar until light and fluffy (about 2 minutes).
- Add egg and vanilla: Beat in the egg and vanilla extract until fully incorporated.
- Combine dry ingredients: In a separate bowl, whisk together flour, baking soda, baking powder, salt, and cinnamon.
- Make the dough: Gradually mix the dry ingredients into the wet ingredients until a soft dough forms. Don’t overmix.
- Chill the dough: Place dough in the refrigerator and chill for 20 minutes to firm it up.
- Portion the dough: Scoop 24 tablespoon-sized portions. Flatten 12 of them into 2-inch disks to serve as the cookie bases.
- Fill the cookies: Place 1 rounded teaspoon of filling into the center of each flattened dough base. Leave edges clear for sealing.
- Add tops and seal: Top with the remaining dough balls. Flatten slightly, gently seal the edges, and shape into rounded cookies.
- Bake: Arrange cookies 2 inches apart on the prepared baking sheets. Bake for 10–12 minutes or until set and lightly golden at the edges.
- Cool: Let cookies cool on the baking sheet for 10 minutes. Then transfer to a wire rack to finish cooling.
- Make the icing: In a bowl, whisk together powdered sugar, cinnamon, vanilla, and milk until you get a thick but spreadable glaze.
- Glaze the cookies: Spoon or drizzle icing over warm (not hot) cookies. Let set for 20–30 minutes before serving or storing.
Tips and Variations
- For extra cinnamon kick, add a pinch of nutmeg or clove to the filling
- Use dark brown sugar for a deeper molasses flavor
- Add a drizzle of maple syrup to the icing for variation
- Want a crunchier edge? Bake an extra minute or two
- Make ahead: Fill and freeze the cookie balls to bake later
Serving Suggestions
These brown sugar pop tart cookies shine when served slightly warm, allowing the filling to remain soft and the glaze delicately set. Their nostalgic flavor and unique presentation make them a standout choice for a variety of occasions.
Best Ways to Serve:
- Warm with milk: Serve fresh from the oven with a glass of cold milk—ideal for kids and nostalgic adults alike.
- Brunch dessert tray: Add to a platter of pastries and fresh fruit at a weekend brunch.
- Holiday cookie swaps: Their filled centers and glaze make them eye-catching among standard cookie varieties.
- Midday coffee break: Pair with a cup of coffee or chai for a comforting afternoon treat.
- Gift boxes or care packages: Stack in a cellophane bag tied with ribbon once glaze has set. They hold shape well and ship easily.
- Lunchbox surprise: Wrap individually for easy packing and a sweet mid-day moment.
To enhance their appearance for serving:
- Drizzle a second layer of thinner glaze in zigzags for a bakery-style look.
- Dust with cinnamon-sugar just before the glaze sets for texture and sparkle.
Common Mistakes to Avoid & How to Perfect the Recipe
Avoiding a few key pitfalls ensures your brown sugar pop tart cookies turn out picture-perfect and flavorful every time.
Mistake 1: Dough too soft before baking
Fix: Always chill the dough for at least 20 minutes before filling and baking. This keeps the cookies from spreading too much.
Mistake 2: Filling leaks during bake
Fix: Avoid overfilling and make sure to seal the edges completely. Leave a clean border around the filling to prevent leaks.
Mistake 3: Glaze won’t set properly
Fix: Allow cookies to cool to warm—not hot—before glazing. If the glaze is too runny, add more powdered sugar; if too stiff, add a few drops of milk.
Mistake 4: Uneven cookie sizes
Fix: Use a cookie scoop to portion dough evenly. This ensures uniform baking and prevents some cookies from being overdone.
Mistake 5: Cookies too hard after baking
Fix: Don’t overbake. Remove cookies when edges are lightly golden but centers still look soft. They’ll continue setting as they cool.
Mistake 6: Filling too loose or watery
Fix: The filling should be sandy and paste-like. If it looks runny, add a bit more flour or brown sugar before assembling.
Mistake 7: Glaze smears during storage
Fix: Let the glaze set fully (20–30 minutes) before stacking or packaging cookies.
Mistake 8: Loss of flavor from ingredient substitutions
Fix: Stick to the original butter, brown sugar, and cinnamon combo. While variations are possible, these ingredients define the flavor profile.
Side Dish Recommendations
Complement your brown sugar pop tart cookies with sides and beverages that enhance their warm, spiced flavor. Here are eight ideal pairings.
Vanilla-Bean Greek Yogurt with Honey
The tanginess of Greek yogurt balances the sweetness of the cookie. Drizzle with honey for a mild floral note.
Cinnamon-Spiced Apple Slices
Fresh apples tossed in cinnamon and lemon juice add brightness and a crisp texture contrast. Simple and refreshing.
Salted Caramel Dipping Sauce
Offer a small dish of warm salted caramel for dipping. The buttery richness complements the brown sugar center beautifully.
Vanilla or Coffee Ice Cream
A scoop of ice cream adds creaminess and cool contrast to warm cookies. Coffee flavor enhances the cinnamon notes.
Hot Chai or Spiced Latte
Serve with a spiced drink featuring cinnamon, cardamom, and clove. These spices echo the cookie’s filling and elevate the experience.
Bourbon Maple Candied Pecans
Crunchy, sweet, and slightly boozy, these nuts pair well with the cookie’s soft texture and brown sugar depth.
Mixed Berry Compote
Tart berries cooked down with minimal sugar cut through the richness of the cookies and provide a fruity contrast.
Milk and Cold Brew Coffee Bar
Classic cold milk or chilled cold brew is the perfect simple pairing. Set up a bar with dairy-free options for a personalized experience.
Recipe Tips, Storage and Reheating Instructions
Key Recipe Tips
- Chill before baking: Always chill the dough for at least 20 minutes to reduce spread and help the filling stay sealed.
- Don’t overfill: A rounded teaspoon of filling is enough. Overstuffing can lead to leaks.
- Seal edges properly: Press edges gently but firmly to encase the filling without tearing the dough.
- Underbake slightly: Remove cookies when centers look a little soft. They’ll firm up as they cool and retain a chewy texture.
- Glaze timing: Glaze when cookies are warm, not hot. This helps the glaze stick and prevents melting or running.
Storage Instructions
- Room Temperature: Store glazed cookies in an airtight container at room temperature for up to 3 days. Place parchment between layers to avoid sticking.
- Refrigerator: Extend freshness by refrigerating for up to 5 days, especially in humid environments.
- Freezer – Baked Cookies: Freeze fully glazed cookies in a single layer. Once frozen, transfer to a freezer-safe container with layers separated by parchment. Store for up to 2 months.
- Freezer – Unbaked Dough: Freeze shaped, filled dough balls before baking. Store in a zip-top bag and bake from frozen, adding 1–2 minutes to the baking time.
Reheating Instructions
- Microwave: Heat individual cookies for 8–10 seconds for a soft, warm center.
- Oven: Reheat in a 300°F (150°C) oven for 3–5 minutes. Allow to rest before serving to avoid hot filling burns.
- Avoid overheating: Reheating too long can dry out the dough or melt the glaze.
Frequently Asked Questions (FAQs)
Can I use dark brown sugar instead of light brown sugar?
Yes, but the flavor will be richer with a deeper molasses note. It may slightly darken the dough and filling.
What’s the best way to prevent filling from leaking?
Make sure the dough is well-chilled and edges are sealed completely. Avoid overfilling and leave a border around the filling.
Can I make these cookies gluten-free?
Yes, use a 1:1 gluten-free flour substitute. Texture may vary slightly, so be sure to chill the dough and monitor baking time.
Do I have to glaze them?
No. While the glaze adds sweetness and a finished look, the cookies are flavorful on their own. You can also dust with powdered sugar as an alternative.
How do I make the glaze set faster?
Let cookies cool on a wire rack where air can circulate. If needed, place cookies in a cool room or under a fan.
Can I customize the filling?
Yes. Try mixing in maple syrup, nutmeg, or a small amount of finely chopped nuts for variation. You can also experiment with jam fillings for a fruit twist.
Are these cookies good for gifting?
Yes. Once cooled and set, they hold shape well and travel nicely. Use parchment paper between layers in a gift box or tin.
Can I bake the dough immediately without chilling?
You can, but the cookies will spread more, may lose shape, and risk the filling leaking. Chilling is highly recommended for the best results.