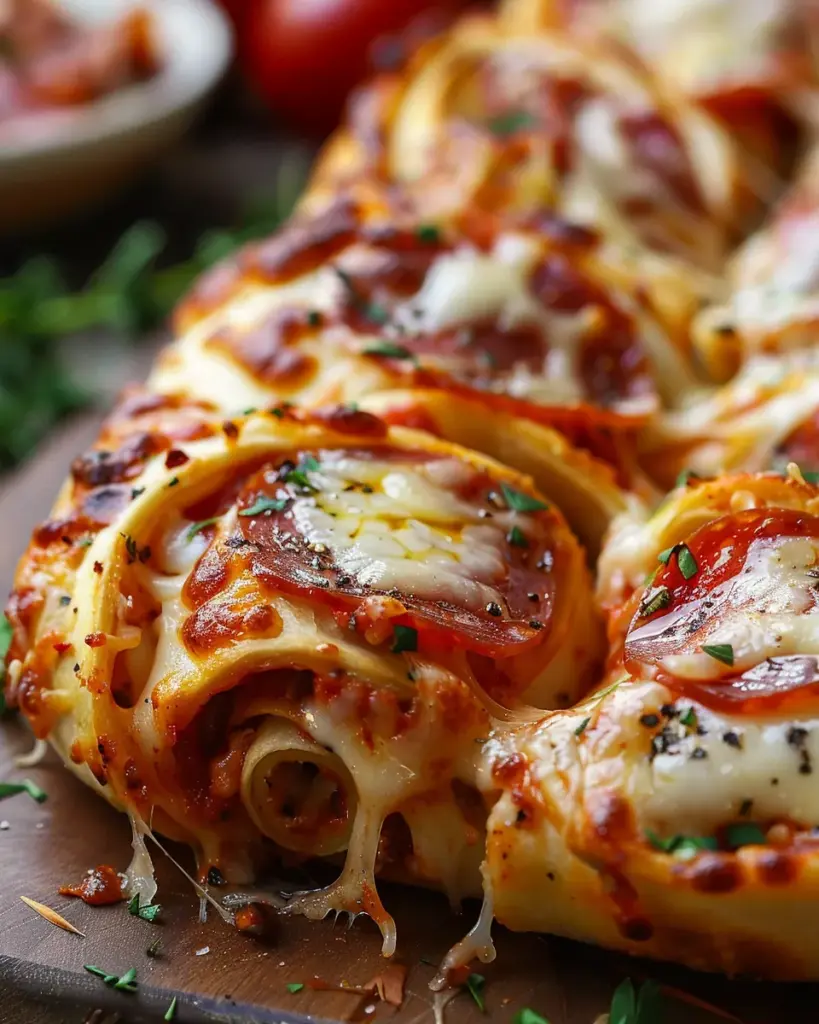
Cheesy Pepperoni Pizza Roll-Ups with Low-Carb Tortillas
These Cheesy Pepperoni Pizza Roll‑Ups with Low‑Carb Tortillas bring all the flavour of your favourite pizza into a quick, handheld roll‑up. With gooey mozzarella cheese, savoury pepperoni, and a crisp tortilla wrap, this dish transforms the classic pizza experience into a fun snack or meal option. Whether you need a fast appetizer for a get‑together or a satisfying solo treat, these roll‑ups deliver easy preparation and irresistible taste. Readers will love how accessible the flavours are, how quick the build‑time is, and how perfect they are for sharing or simply grabbing on the go.
Preparation Phase & Tools to Use
Essential Tools and Equipment
- Baking sheet – to bake the roll‑ups evenly.
- Parchment paper – for non‑stick and easier cleanup.
- Rolling pin – optional, to slightly flatten tortillas for easier rolling.
- Sharp knife – to slice the roll‑up log into neat pinwheels.
- Oven (or skillet with lid) – depending on your preferred cooking method.
Importance of Each Tool
- The baking sheet gives an even heat base so the roll‑ups bake uniformly.
- Parchment paper prevents sticking and lets you remove the roll‑ups cleanly without tearing the tortilla.
- A rolling pin allows you to flatten the tortilla slightly, making it easier to roll without over‑thick walls that may not cook through.
- The sharp knife ensures clean cuts so each roll‑up holds its shape and fillings stay intact.
- Using the oven ensures consistent bake and browning; the skillet option offers a quicker stovetop alternative.
Preparation Tips
- Preheat the oven early so it reaches the correct temperature before the roll‑ups go in.
- If tortillas are cold or stiff, let them sit at room temperature for a few minutes—this prevents cracking when rolling.
- Don’t over‑fill the tortillas; leaving a ½‑inch to 1‑inch border around the edge allows for better rolling and less filling spill‑out.
- After slicing into pinwheels, place them cut‑side up on the baking sheet so the filling is visible and the cheese melts evenly.
- Consider rotating the baking sheet half‑way through baking if your oven has uneven heat zones.
Ingredients
- 8 low‑carb tortillas (approximate size: 8″ diameter)
- ~1 cup marinara sauce (plus extra for dipping)
- 1½ cups shredded mozzarella cheese
- ~30 slices pepperoni (adjust depending on preference)
- Optional add‑ins: diced bell peppers, sliced olives, red‑pepper flakes, oregano
Step‑by‑Step Directions
- Preheat the oven to 375 °F (190 °C).
- If desired, lightly press each tortilla with a rolling pin to slightly flatten and ease rolling.
- On each tortilla, spread about 2 tablespoons of marinara sauce, leaving about a ½‑inch (1 cm) border around the edges.
- Layer about 3–4 slices of pepperoni and roughly 2 tablespoons of shredded mozzarella cheese on top of the sauce.
- Starting from one edge, roll the tortilla tightly into a log, ensuring the ends are tucked in so the fillings stay inside.
- Using a sharp knife, slice each roll into approximately 1‑inch (2.5 cm) thick pinwheels. Place them cut‑side up on a baking sheet lined with parchment paper.
- Bake for 12–15 minutes, or until the roll‑ups appear golden brown and the cheese is bubbly and melted. For extra crisping, bake an additional 2–3 minutes.
- Remove from the oven, let them cool for about 2 minutes, then serve warm with extra marinara sauce for dipping.
Variation Tips
- Swap pepperoni for turkey pepperoni or your favourite meat alternative for a different flavour profile.
- Omit the meat entirely for a vegetarian version; increase veggies like diced bell peppers or mushrooms to boost texture.
- Add a sprinkle of oregano or red‑pepper flakes into the filling before rolling for extra flavour and a hint of heat.
- For a stovetop version: after slicing, heat a non‑stick skillet with a little oil over medium heat, place each roll‑up cut‑side down for 1–2 minutes until golden, then cover and reduce heat to low, cooking 4–5 minutes until cheese melts.
Serving Suggestions
Start by arranging your roll‑ups on a platter—either upright or cut‑side up so the swirls of pepperoni and cheese are visible. Place a small bowl of extra marinara sauce in the centre for dipping; this gives guests the option to add more sauce if they like. Choose colourful garnishes like fresh basil sprigs or chopped parsley around the edge of the platter to brighten the presentation. For casual occasions, lay out napkins and small plates so guests can help themselves.
Common Mistakes To Avoid & How to Perfect the Recipe
- Over‑filling the tortillas: If you use too much sauce or cheese, the roll‑ups may unfurl during slicing or baking. Always leave about a ½‑inch border around the edge so the roll holds together.
- Rolling too loosely: A loose roll means the layers might separate or the filling may spill during bake. Roll snugly and pinch the seam closed.
- Too thick tortillas: If your tortilla wrap is very thick, it may not bake through to a crisp exterior by the time the cheese is melty. Flatten slightly if needed, or extend bake time by a few minutes.
- Uneven slicing: If the section thickness is inconsistent, some will bake faster than others leading to mixed textures (some over‑done, some under‑done). Use a sharp knife and aim for uniform ~1‑inch sections.
- Skipping the rest period: Serving immediately out of the oven means very hot cheese and sauce; letting them rest 2 minutes improves safety and makes it easier to handle.
- Not pre‑heating the oven: If the oven isn’t at full temperature, baking time will vary and texture will suffer. Verify temperature before inserting roll‑ups.
- Using overly watery sauce: A runny sauce will increase moisture inside the roll and reduce crispness. Use a firm‑body marinara or drain excess liquid.
By catching these common issues, you’ll achieve roll‑ups that are crisp on the outside, gooey on the inside, and visually appealing.
Side Dish Recommendations
Complement your roll‑ups with sides that add texture contrast, colour, or balance. Here are eight strong options:
1. Crisp Green Salad
A fresh salad with mixed greens, cucumber, cherry tomatoes and a light vinaigrette adds a crisp, cool contrast to the warm, cheesy roll‑ups.
2. Baked Zucchini Fries
These provide a veggie‑rich alternative to traditional fries; their crisp exterior pairs well with the soft roll texture.
3. Parmesan Roasted Broccoli
Roasted florets lightly coated in Parmesan add flavour and colour, and bring some green balance to the plate.
4. Caprese Skewers
Skewered mozzarella, basil and cherry tomatoes drizzled with balsamic offer a classic Italian flavour echo and a light side.
5. Garlic Breadsticks
Warm breadsticks brushed with garlic‑butter provide that extra “bread” element without over‑complicating the menu.
6. Coleslaw
A tangy, crunchy slaw cuts through the richness of the roll‑ups and adds a refreshing element.
7. Sweet Potato Fries
For a slightly sweet, crisp side that athletes well with the savoury roll‑ups, sweet‑potato fries are a fun twist.
8. Italian Pasta Salad
A chilled pasta salad with Italian dressing gives a make‑ahead friendly side with complementary flavours.
These side options ensure your meal is balanced, visually appealing, and caters to a variety of tastes and textures.

Recipe Tips
- Serve your roll‑ups straight from the oven to enjoy that perfect contrast of crisp tortilla and gooey cheese.
- If the tortillas are a little stiff or dry, lightly brush them with a bit of olive oil before adding fillings to help them roll without cracking.
- Use low‑carb tortillas with good flexibility. Some ultra‑low‑carb wraps can be brittle—choose one that lists “soft taco” size and has reviews mentioning roll‑ups.
- To boost flavour, add a pinch of dried Italian herbs (oregano, basil) or red‑pepper flakes inside before rolling.
- For an extra crisp exterior, switch the oven to broil for the last 1–2 minutes—watch carefully so it doesn’t burn.
- If you’re prepping ahead, you can roll and slice the tortillas, place the pinwheels on the baking sheet, cover tightly, and refrigerate for up to 2 hours before baking. Then bake just as directed.
Storage and Reheating Instructions
Storing Leftovers:
- Allow roll‑ups to cool to near room temperature before covering to avoid trapped steam.
- Place them in an airtight container or wrap tightly with plastic wrap.
- Refrigerate for up to 2–3 days—cheese may firm up and tortilla may lose some crispness.
Freezing (optional): - Freeze the baked roll‑ups by placing on a sheet in the freezer until solid, then transfer to freezer bags.
- To reheat, bake from frozen at 375 °F (190 °C) for about 10‑12 minutes or until heated through and crisp.
Reheating: - Preheat oven to 350 °F (175 °C).
- Place roll‑ups on parchment‑lined sheet and bake for 8‑10 minutes until warmed and cheese melty.
- Avoid microwave reheating if you want to keep crispiness—the tortilla will soften.
Tip: If reheating refrigerated roll‑ups, letting them sit 10‑15 minutes out of fridge helps them re‑warm more evenly.
FAQs
Q: Can I make these ahead and bake later?
A: Yes. You can roll and slice the tortillas ahead of time, cover and refrigerate for up to 2 hours before baking. Bake just before serving for best texture.
Q: What low‑carb tortilla should I use?
A: Choose a tortilla labelled “low‑carb”, “soft taco size”, and preferably one that has good flexibility in reviews. If it’s too stiff it may crack when rolling.
Q: Can I swap the protein for a vegetarian version?
A: Absolutely. Omit pepperoni and add extras such as diced bell peppers, sliced olives, mushrooms or artichoke hearts for a veggie‑rich option.
Q: Can I freeze these roll‑ups before baking?
A: Yes, you can. Freeze the rolled and sliced pieces on a sheet first. Then bake from frozen, adding a few minutes to the bake time.
Q: How can I keep them extra crisp when reheating?
A: Use the oven rather than a microwave. If concerned about sogginess, place them on a wire rack over a baking sheet so air circulates beneath.