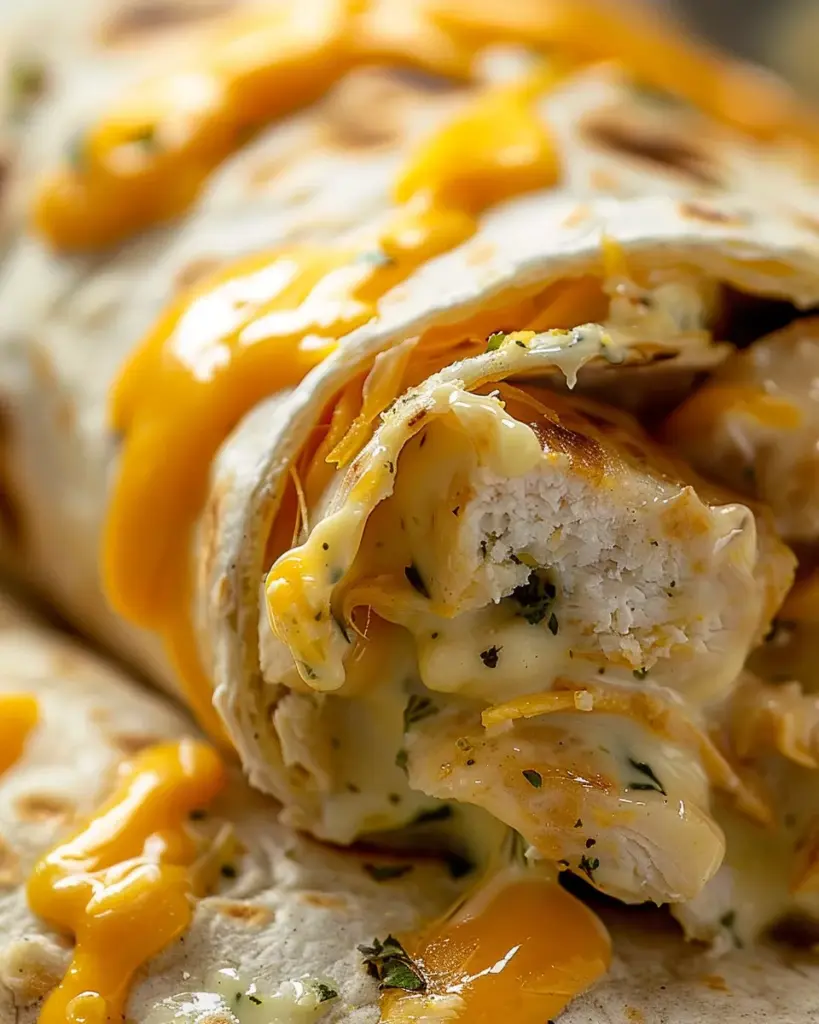
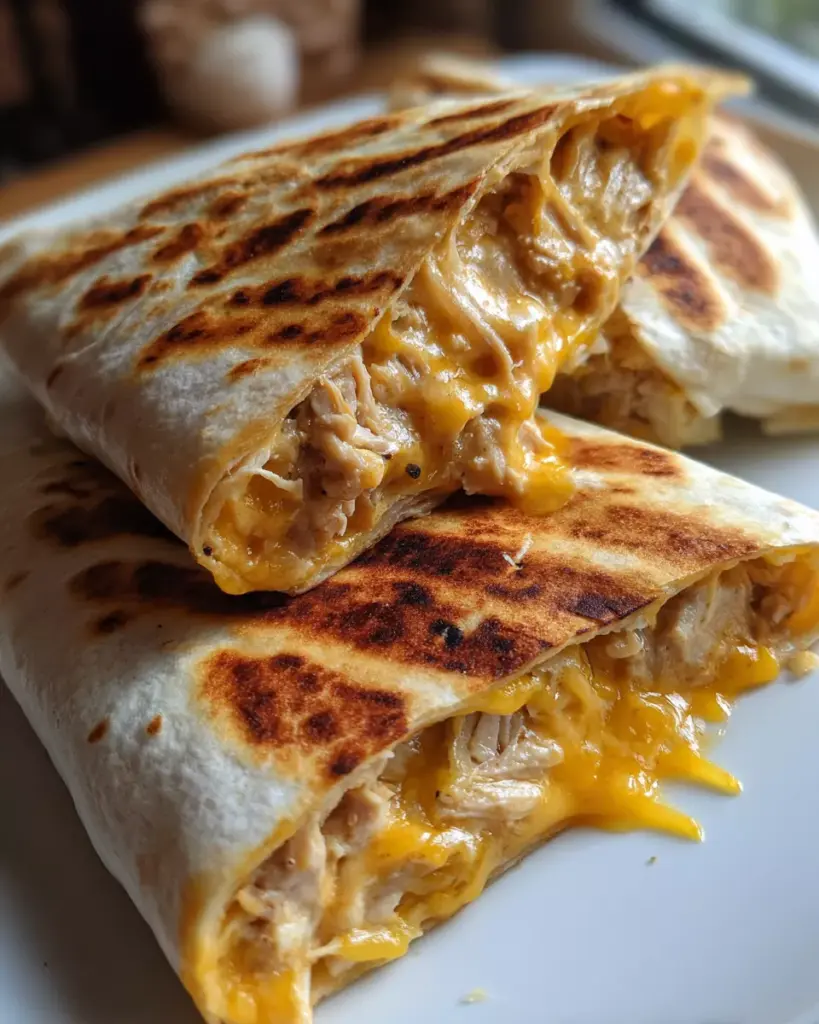
Cheesy Garlic Chicken Wraps
Cheesy Garlic Chicken Wraps are a delicious, quick-to-prepare meal featuring tender shredded chicken tossed in creamy garlic aioli, wrapped in a soft tortilla with melted cheddar cheese, then grilled until perfectly golden and crisp. This recipe blends convenience with rich flavor, making it a top choice for busy weeknights, meal prep, or satisfying lunches.
Why You’ll Love This Recipe
- Melty, garlicky comfort food that feels indulgent but takes less than 30 minutes to prepare
- Versatile and customizable: great for adding veggies or swapping cheeses
- Perfectly portable for packed lunches, quick dinners, or a handheld snack
- Minimal ingredients and prep time, but maximum flavor
- Ideal for leftover chicken or rotisserie chicken use
- Crispy tortilla outside and gooey, cheesy, savory filling inside for a satisfying texture contrast
Preparation Phase & Tools to Use
Essential Tools and Equipment
To make Cheesy Garlic Chicken Wraps, gather these tools for optimal efficiency and results:
- Non-stick skillet – Ensures even toasting and easy cleanup
- Large mixing bowl – Ideal for combining shredded chicken and aioli
- Grater – For fresh shredding cheddar cheese
- Spatula or tongs – For flipping wraps easily while grilling
- Knife and cutting board – For preparing and shredding the chicken
- Measuring cups/spoons – To maintain proper balance of ingredients
- Large tortillas – For wrapping and holding all components without tearing
Importance of Each Tool
- Non-stick skillet is key to achieving a crispy, golden tortilla without burning
- Mixing bowl helps evenly coat the chicken with the aioli
- Grater lets you use fresh cheese, which melts better than pre-shredded
- Spatula or tongs prevent tearing the wrap during flipping
- Cutting tools streamline prep if using whole cooked chicken
Preparation Tips
- Warm tortillas for 10–15 seconds in the microwave before filling to prevent cracks
- Use cold cheese to keep it from clumping during prep
- Preheat the skillet to medium heat before adding the wraps
- Prepare all ingredients before assembly for a smooth workflow
- Avoid overfilling to prevent the wrap from bursting during grilling
Ingredients
Makes 4 wraps
- 2 cups cooked chicken (shredded)
- ½ cup garlic aioli
- 1 cup cheddar cheese (shredded)
- 4 large tortillas
- Salt and pepper to taste
Optional Add-ins:
- Sautéed bell peppers or spinach
- Extra shredded cheese (mozzarella, pepper jack)
- Hot sauce or sriracha for added kick
- Fresh herbs (parsley, cilantro) for garnish
Step-by-Step Directions
Follow these easy steps to create the perfect Cheesy Garlic Chicken Wraps:
- Mix Chicken
- In a large bowl, combine 2 cups of shredded chicken with ½ cup garlic aioli.
- Season with salt and pepper to taste.
- Tip: Use warm chicken to help the aioli bind and enhance flavor absorption.
- Assemble the Wraps
- Lay out the 4 tortillas flat.
- Spoon the chicken mixture onto the center of each tortilla.
- Sprinkle ¼ cup shredded cheddar cheese evenly on top of each.
- Wrap
- Fold the sides of each tortilla in, then roll tightly from the bottom up.
- Place seam-side down on a plate to hold shape.
- Tip: Don’t overstuff the wrap — keep filling to the center.
- Grill
- Heat a non-stick skillet over medium heat.
- Place wraps seam-side down into the skillet.
- Grill for 2–3 minutes on each side, or until golden and the cheese is melted.
- Tip: Cover the skillet for part of the cooking time to help melt the cheese fully.
- Serve
- Remove from heat, slice in half if desired, and serve immediately.
- Garnish with extra aioli, hot sauce, or chopped herbs.
Tips & Variations
- Cheese swaps: Try Monterey Jack, mozzarella, or pepper jack
- Healthier option: Use whole-wheat or low-carb tortillas
- Spice it up: Add a dash of paprika or chili flakes to the chicken mix
- Vegetarian version: Substitute with grilled tofu or chickpeas
- Make-ahead: Chicken filling can be stored in the fridge for up to 2 days
- Freezer-friendly filling: Store chicken mixture in an airtight container for up to 1 month
Serving Suggestions
Cheesy Garlic Chicken Wraps are satisfying on their own but pair beautifully with a variety of side dishes and accompaniments. These suggestions enhance the overall meal, balance flavors, and elevate the presentation.
Suggested Pairings
- Simple Green Salad: A light, crisp salad with a lemon vinaigrette balances the richness of the wrap.
- Sweet Potato Fries: Roasted or air-fried for a naturally sweet, crispy side that complements the garlic and cheese.
- Fresh Fruit: Grapes, apple slices, or melon offer a refreshing contrast.
- Dipping Sauces: Garlic aioli, ranch dressing, spicy sriracha mayo, or chipotle sauce enhance the flavors.
- Soup Combo: Serve with tomato soup or creamy broccoli cheddar for a cozy, café-style meal.
- Drink Ideas: Iced tea, lemonade, flavored sparkling water, or even a crisp white wine for adult diners.
Common Mistakes To Avoid & How to Perfect the Recipe
Avoid these common errors to ensure your Cheesy Garlic Chicken Wraps turn out perfectly every time.
Overfilling the Wrap
Issue: Overstuffed wraps are hard to fold and may burst open during grilling.
Solution: Stick to about ⅔ cup filling per tortilla and keep ingredients centered.
Using Cold Tortillas
Issue: Cold tortillas crack when rolled.
Solution: Warm each tortilla for 10–15 seconds before assembling to make them more pliable.
Skillet Too Hot
Issue: High heat burns the tortilla before the cheese melts.
Solution: Use medium heat and monitor closely for even browning.
Cheese Not Melting Properly
Issue: Cold fillings or short cooking times lead to unmelted cheese.
Solution: Use room temperature fillings and cover the skillet briefly to trap heat.
Soggy Wraps After Reheating
Issue: Microwaving leftovers can lead to sogginess.
Solution: Reheat in a skillet, oven, or air fryer to restore crisp texture.
Thin or Low-Quality Tortillas
Issue: Cheap or thin wraps tear easily and don’t hold filling well.
Solution: Use thick, high-quality tortillas designed for burritos or grilling.
Side Dish Recommendations
Pair these wraps with one of the following flavorful, balanced side dishes.
Fresh Garden Salad with Lemon Vinaigrette
Crisp lettuce, cucumbers, and cherry tomatoes tossed in a zesty lemon vinaigrette offer a refreshing contrast to the savory wrap.
Sweet Potato Fries
Roasted or air-fried sweet potato fries bring a slightly sweet element and extra fiber, perfect for dipping in extra aioli.
Roasted Broccoli with Garlic
Oven-roasted broccoli with garlic and olive oil echoes the garlic in the wrap while adding nutritious greens.
Coleslaw with Yogurt-Dill Dressing
This creamy, crunchy side provides a cool texture and light flavor balance.
Corn on the Cob
Grilled or boiled, corn adds a sweet and smoky touch to the meal.
Crispy Tortilla Chips and Salsa
A fun, crunchy side that fits well with the wrap’s tortilla-based format. Add guacamole for an extra treat.
Tomato-Cucumber Salad with Feta
A Mediterranean twist with juicy tomatoes, crisp cucumber, crumbled feta, and herbs.
Steamed Green Beans with Almonds
A light and nutritious vegetable option with a bit of crunch from toasted almonds
Recipe Tips, Storage and Reheating Instructions
Perfecting your Cheesy Garlic Chicken Wraps doesn’t end with the initial cook. Proper storage and reheating can make all the difference in maintaining flavor and texture.
Cooking Tips Summary
- Use high-quality tortillas to prevent tearing and ensure better folding
- Spread cheese evenly so it melts uniformly and binds the filling
- Heat wraps seam-side down first to help seal them shut
- Avoid overfilling to maintain wrap integrity during cooking
- For added crispness, brush the tortilla with butter or oil before grilling
Storage Instructions
Refrigeration
- Store fully cooked wraps in an airtight container in the refrigerator for up to 2 days
- Keep wraps separated with parchment paper to avoid sticking
Freezing
- Freezing fully assembled and grilled wraps is not recommended due to texture loss
- Instead, freeze the shredded chicken and garlic aioli mixture in a sealed container for up to 1 month
- Thaw overnight in the refrigerator before using
Reheating Instructions
- Skillet Method: Place wrap in a preheated non-stick skillet on medium heat. Cook for 2 to 3 minutes per side until heated through and crispy.
- Air Fryer Method: Preheat to 190°C (375°F) and air fry for 4 to 6 minutes, flipping halfway through.
- Oven Method: Preheat oven to 200°C (400°F). Wrap in foil and bake for 10 to 12 minutes. For crispier results, remove foil in the last few minutes.
- Microwave Method: Not recommended due to loss of crispness. If using, wrap in a paper towel and heat for 30–60 seconds.
Make-Ahead Tips
- Prepare and store the chicken and aioli mixture up to 2 days in advance
- Grate cheese and store separately in the refrigerator
- Assemble and grill when ready to eat for best results
Health and Nutrition Tips
- Substitute Greek yogurt for garlic aioli for a lighter version
- Use whole-wheat or low-carb tortillas for added fiber or fewer carbs
- Add veggies like spinach or peppers inside the wrap to boost nutrients
- Opt for reduced-fat cheese to lower saturated fat content
Frequently Asked Questions
Can I use rotisserie chicken?
Yes. Rotisserie chicken is an excellent shortcut. Shred and mix with garlic aioli just like cooked chicken.
What tortillas are best for this recipe?
Use large, soft flour tortillas labeled for burritos or wraps. Avoid thin tortillas that tear easily when filled.
How can I make this recipe gluten-free?
Use gluten-free tortillas and ensure the garlic aioli and cheese you use are certified gluten-free.
Can I make this vegetarian?
Yes. Substitute the chicken with cooked tofu, tempeh, or a plant-based chicken alternative. Keep the garlic aioli or swap it with a dairy-free sauce.
How can I make garlic aioli at home?
Mix ½ cup mayonnaise with 1–2 teaspoons of minced garlic, a squeeze of lemon juice, and a pinch of salt and pepper. Let it sit for at least 10 minutes to develop flavor.
Can I add vegetables to the wrap?
Yes. Bell peppers, sautéed mushrooms, spinach, or tomatoes all pair well with the chicken and cheese.
How do I keep my wraps from getting soggy?
Use a dry skillet for grilling, do not overfill with moist ingredients, and avoid wrapping while the filling is piping hot. Store and reheat wraps using dry heat methods like skillet or air fryer.
Is this recipe kid-friendly?
Absolutely. The familiar flavors of cheese and chicken make it a great option for children. You can also customize spice levels.
Can I cook these in the oven instead of a skillet?
Yes. Preheat the oven to 200°C (400°F) and bake for 10 to 12 minutes, flipping once to ensure even browning. Use a baking rack to maintain crispness.
What’s the best cheese for melting?
Cheddar works well, especially sharp cheddar for flavor. You can also use mozzarella for extra stretch or pepper jack for a spicy version.