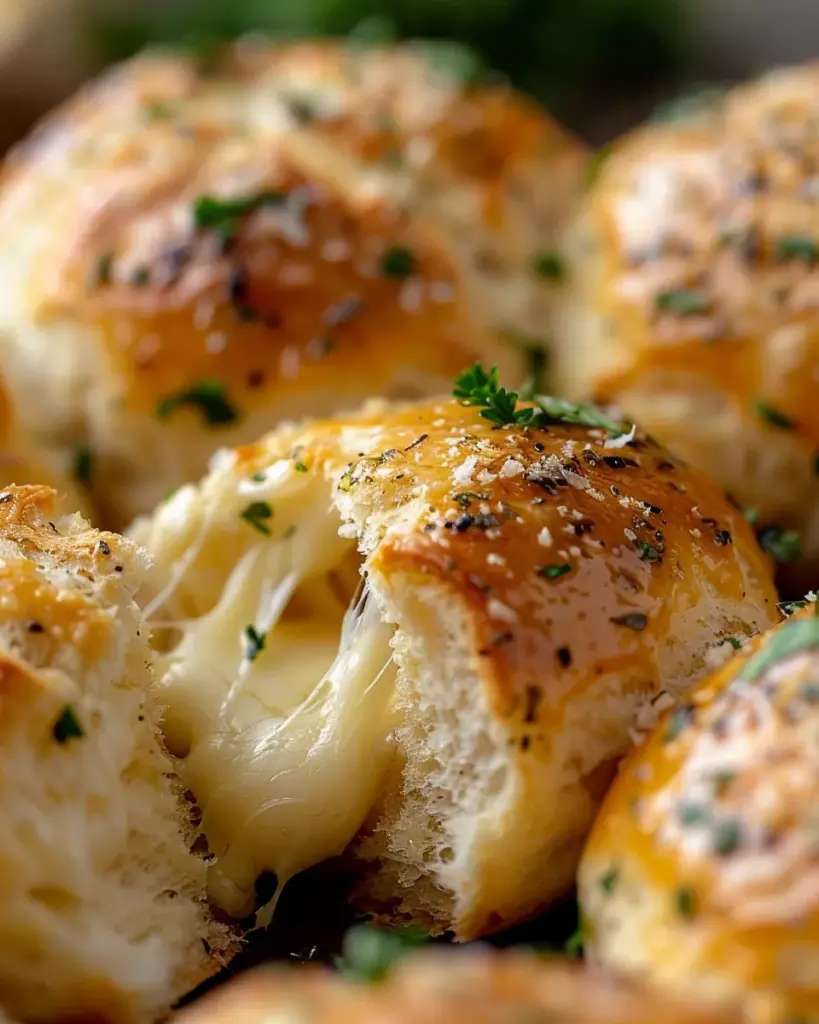
cheesy GARLIC BUTTER BOMBS
Imagine biting into a warm, golden-brown biscuit only to be met with a molten core of gooey mozzarella and a buttery, garlicky crust. These Pillsbury Biscuit Garlic Butter Cheese Bombs deliver all that and more. They’re quick to make, loaded with flavor, and have an indulgent, comforting quality that makes them perfect for nearly any occasion.

Whether you’re hosting game night, preparing a family snack, or simply craving something cheesy and satisfying, these cheese-stuffed biscuit bombs are a guaranteed hit. They use refrigerated Pillsbury dough, which makes prep a breeze, while the homemade garlic butter adds that special, from-scratch taste.
If you love easy recipes with high reward and minimal cleanup, you’ll fall head-over-heels for these biscuit bombs.
Preparation Phase & Tools to Use
Before diving into the assembly, proper preparation ensures everything comes together smoothly. Organize your ingredients, set your oven, and prepare your work surface.
- Preheat your oven to 375°F (190°C)
- Line your baking sheet with parchment paper to prevent sticking
- Arrange ingredients and tools for easy access
This foundational prep helps you move efficiently without missing any steps.
Essential Tools and Equipment
You don’t need any fancy gadgets. These common kitchen tools get the job done:
- Oven – Essential for baking until golden brown
- Baking sheet – Allows even heat distribution
- Parchment paper – Prevents sticking and aids cleanup
- Mixing bowl – For making the garlic butter mixture
- Small bowl – Great for melted butter and herbs
- Measuring spoons and cups – Ensures ingredient accuracy
- Spatula or spoon – For mixing and spreading
- Pastry brush (optional) – Helps evenly coat biscuits in butter
Importance of Each Tool
- Baking sheet + parchment paper: Guarantees an even bake with easy cleanup
- Mixing bowls: Keeps butter mixture homogenous
- Pastry brush: Distributes butter evenly without waste
- Measuring tools: Avoids oversalting or underseasoning
Preparation Tips
- Let the biscuit dough sit for a couple minutes at room temperature for easier handling
- Gently separate each biscuit to avoid tearing the edges
- Flatten dough using your fingers or the base of a cup
- Don’t overfill the center to prevent cheese leakage
- Pinch and seal edges tightly to trap the cheesy goodness
- Allow melted butter to cool slightly before dipping dough to prevent sogginess
Ingredients
For the Dough
- 1 can Pillsbury Grands! refrigerated biscuit dough
For the Cheese Filling
- 1 cup shredded mozzarella cheese (swap for cheddar or pepper jack if desired)
- ¼ cup grated Parmesan cheese (use vegetarian Parmesan if preferred)
For the Garlic Butter
- ½ cup unsalted butter (allows better salt control)
- 3 cloves fresh garlic, minced (adjust for stronger garlic flavor)
- 1 teaspoon dried Italian herbs (or use fresh if available)
- ¼ teaspoon red pepper flakes (optional or adjust to taste)
- ½ teaspoon salt
- ¼ teaspoon black pepper
For Garnish
- 1 tablespoon fresh parsley, chopped
Optional: Marinara sauce or ranch dressing for dipping
Step-by-Step Directions
- Preheat oven to 375°F (190°C) and line your baking sheet with parchment paper.
- In a small bowl, melt the butter and stir in garlic, herbs, red pepper flakes, salt, and pepper until fully combined.
- Carefully separate each biscuit from the can.
- Flatten each biscuit into a 3-inch round using your fingers or a glass bottom.
- Place 1 tablespoon of mozzarella cheese in the center.
- Sprinkle Parmesan cheese over the mozzarella for an extra cheesy layer.
- Fold the dough over the filling, pinch the edges, and seal tightly to form a ball.
- Dip each ball into the garlic butter mixture, coating completely.
- Arrange seam-side down on the prepared baking sheet.
- Sprinkle the tops with additional Parmesan cheese.
- Bake for 12–15 minutes until golden brown and puffed.
- Let cool for a few minutes before serving.
- Drizzle with any remaining garlic butter and garnish with fresh parsley.
- Serve warm with optional dipping sauces like marinara or ranch.
Tips and Variations
- Add cooked bacon bits inside for a meaty variation
- Use cheddar or pepper jack for a bold cheese twist
- Want it spicier? Add a few extra red pepper flakes
- For a crispy bottom, place finished bombs on a cooling rack immediately after baking
- Double the batch for parties — they’ll disappear fast
Serving Suggestions
These Pillsbury Biscuit Garlic Butter Cheese Bombs are versatile and perfect for nearly any setting. Whether you’re planning a weekend gathering, a game night snack spread, or a casual family dinner, they add a warm, cheesy highlight to the table.
They shine as:
- A quick and satisfying appetizer
- A fun party snack for groups
- A side dish for pasta or salad
- A brunch item alongside eggs and fruit
- A late-night indulgence when cravings hit
Presentation tips:
- Serve on a wooden board lined with parchment for a rustic look
- Garnish with extra chopped parsley
- Offer dipping sauces in ramekins like marinara, ranch, or garlic aioli
- Keep them warm by placing them in a low oven (200°F) if serving over time
Pair them with a variety of beverages like sparkling water, iced tea, or soft drinks for a balanced snack experience.
Common Mistakes to Avoid & How to Perfect the Recipe
Even a simple recipe like this can go sideways without a few essential tips. Here are common mistakes to avoid — and what to do instead.
Overfilling the Dough
Problem: Cheese spills out while baking
Fix: Use no more than 1 tablespoon of filling. Seal the dough completely by pinching edges together.
Sealing Incorrectly
Problem: Edges open during baking
Fix: Press seams firmly and place the sealed side facing down on the baking tray.
Using Cold Dough
Problem: Dough cracks and resists shaping
Fix: Let biscuits rest at room temperature for 2–3 minutes before flattening.
Butter Mixture Is Too Hot
Problem: Over-melts the dough, making it soggy
Fix: Let garlic butter cool slightly before dipping.
Oven Not Properly Preheated
Problem: Inconsistent texture or flat biscuits
Fix: Always preheat the oven fully to 375°F before baking.
Overbaking
Problem: Dry, hard biscuit exterior and chewy cheese
Fix: Check at the 12-minute mark. Bake just until golden brown and puffed.
Not Rotating the Tray
Problem: Uneven browning
Fix: Rotate the baking sheet halfway through cooking if your oven has hot spots.
Serving Too Late
Problem: Bombs lose their crispness
Fix: Serve immediately after baking, or reheat briefly in the oven to restore texture.
Perfecting these simple techniques ensures each biscuit bomb is golden, gooey, and irresistible.
Side Dish Recommendations
To elevate your cheese bombs into a full meal or enhanced appetizer platter, try pairing them with these delicious side options. The following dishes provide a range of textures and flavors that balance the rich, garlicky nature of the bombs.
Marinara Dipping Sauce
A classic choice. The acidity of tomato sauce contrasts beautifully with the buttery dough and cheesy center. Warm it slightly before serving for best flavor.
Ranch or Herb Yogurt Dip
Cool and tangy dips like ranch or a lemon-herb Greek yogurt spread complement the rich cheese bombs and add refreshing balance.
Crisp Garden Salad
A simple salad with mixed greens, cucumber, tomatoes, and vinaigrette helps cleanse the palate and keeps the meal light.
Roasted Vegetable Medley
Toss zucchini, bell peppers, and carrots with olive oil and roast until caramelized. Their earthy flavor pairs nicely with the bombs.
Garlic Parmesan Fries
Double down on the garlic and cheese theme by serving baked fries tossed in Parmesan and minced garlic. Serve with extra dipping sauces.
Coleslaw with Light Dressing
Creamy slaw or vinegar-based coleslaw adds a crunch and sharpness that balances the richness of the cheese bombs.
Fruit Platter with Yogurt Dip
Include grapes, berries, and melon slices with a honey-yogurt dip for a sweet, juicy contrast to the savory bombs.
Simple Tomato-Cucumber Salad
Chop fresh tomatoes, cucumbers, parsley, and toss with lemon juice, olive oil, and sea salt. It’s fresh, hydrating, and adds vibrant color to your plate.
Recipe Tips, Storage and Reheating Instructions
These Pillsbury Biscuit Garlic Butter Cheese Bombs are best served fresh, but they’re also easy to store and reheat. Below are expert tips to help you prepare, store, and enjoy them to their full potential.
Expert Tips
- Use high-moisture mozzarella for a gooey, melty center
- Let the garlic butter rest a few minutes after melting to intensify the herb flavor
- Seal the dough completely to avoid cheese leakage
- Add a second garlic butter glaze after baking for a glossy, flavorful finish
- Bake on parchment paper to prevent sticking and ensure easy cleanup
- Brush tops mid-bake with additional butter for a crispier crust
Storing Leftovers
Store bombs in an airtight container:
- At room temperature: Up to 2 hours
- In the refrigerator: Up to 2 days
- In the freezer: Up to 1 month (wrap individually for best results)
To prevent sogginess, allow bombs to cool completely before storing.

Reheating Instructions
Oven (recommended):
- Preheat to 350°F (175°C)
- Place bombs on a baking sheet
- Reheat for 5–7 minutes until warmed through
Toaster oven:
- Preheat to 350°F
- Heat 5–6 minutes until the crust regains its crisp texture
Air fryer:
- Set to 330°F
- Heat for 3–5 minutes
Avoid microwaving, as it softens the crust and makes the texture rubbery.
Freezing and Reheating from Frozen
- Place frozen bombs directly on a baking sheet
- Bake at 375°F for 10–12 minutes
- Reapply garlic butter and garnish after reheating
Frequently Asked Questions (FAQs)
These common questions are based on real queries from the “People Also Ask” section of search engines.
Can I make these biscuit bombs ahead of time?
Yes. You can assemble and refrigerate them unbaked for up to 1 hour. Bake just before serving for the best texture.
What cheese alternatives can I use?
Try cheddar, pepper jack, gouda, or gruyère. All melt well and add unique flavors.
Can I use whole-wheat or gluten-free dough?
Yes. Whole-wheat works well, though the flavor is nuttier. Gluten-free biscuit doughs may vary by brand — follow package instructions closely.
Are they spicy with red pepper flakes?
The spice is very mild. For a kick, double the flakes. To make them kid-friendly, omit them entirely.
Can I use an air fryer?
Yes. Air fry at 350°F for 8–10 minutes. Be sure to space them out for even airflow.
Why is my cheese leaking out?
Usually, this happens from overfilling or improper sealing. Flatten dough evenly and seal the edges firmly.
Are these bombs good for kids?
Absolutely. Omit the pepper flakes for a milder version. They’re great for lunchboxes or after-school snacks.
Can I add meat inside?
Yes. Add a small slice of pepperoni, cooked sausage, or ham with the cheese for a hearty, pizza-inspired bite.